Friday 31 March 2017

Ralph in the Easter Parade

Hello lovely peeps


Just popping in with my second entry in Bloobel's Progressive Challenge.
The theme for March is 'Easter Parade' - there was a choice of 5 characters with hats which you have to decorate, I chose 'Ralph'. Isn't he fab ?!

 I coloured him with Promarkers
Cool Grey 1,3,4,5
Pastel Beige, Khaki, Umber
Cardinal Red

then added shading with Lyra Rembrandt Polycolor Pencils
Black/Dark Sepia/Van Dyck Brown


I layered him up on 'Gentlemen Folk' papers from Nitwit, then added buttons and a sentiment printed on my computer using the font Mister Sirloin BTN Rare.  His hat is decorated with a punched flower with a dab of 'Buttermilk' Nuvo Crystal Drops from Tonic in the centre.

I would like to enter this in the following challenges:-
Bloobel Progressive Challenge - Easter Parade (decorate the hat)
Animal Friends Challenge  #48 Animal with big ears
Colour Crazy Challenge #12 AG 
Incy Wincy Designs - Happy Birthday

Thanks for stopping by,
Katrina x

Thursday 30 March 2017

Robots Rule for Leonie

Hello lovely peeps


Here's the last of the cards I made for Leonie's Typography launch - I saved the fun one til last :)

To do the robot's head and body I stamped some of the frames from the Banners and Frames set. They were a bit too wide for what I wanted so I stamped off the edge of the card and stamped the extra ends on.


I used Versamark ink with Pewter embossing powder on two different shades of grey card


For the robot legs and arms I embossed the legs from the Ragdoll stamp set and cut them out. Because the stamps are polymer they are easy to bend.


I attached the arms and legs at the back with tape


and then glued the robot onto layers of  paper from the Wild at Heart 8x8 pad by Trimcraft. There's a little circle in the Banners and Frames set that I used for the eyes, and I used one of the buttons in the Ragdoll set for the 'screws'

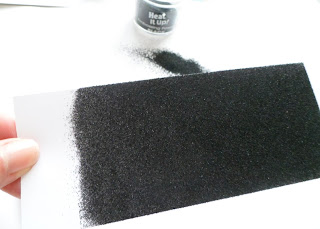
To do the lettering I covered some card with black embossing powder and heated it


then cut it up and placed it over the relevant letters on the Typography dies before running through my Ebosser.


I finished off with some gears that I die-cut using the 'Cogs and Gears' dies from Sara's Just For Men collection.


I would like to enter this in the following challenges:- 
Southern Girls 156 Use die-cut
One Crazy Stamper  Anything Goes
World Wide Open Design Team Challenge 20 Anything Goes
Penny's Paper-Crafty Challenge Blog #322 Anything Goes
Love to Scrap  #95 - Anything Goes

Thanks for stopping by,
Katrina x

Sunday 26 March 2017

Swinging Sixties for LOTV

Hello lovely peeps


I'm popping in to show you one of the new Decades girls being launched by Lili of the Valley on 3rd April, they will be available first as digis and Simply Print

This cutie is Swinging Sixties and I've used the Simply Print version since my colouring arm is dodgy at the moment.

I covered a 7"x7" card blank with a paper from the County Cottage digikit by Louise Mulgrew, then die-cut lots of circles from various papers in my stash using my Ebosser.  The flower die was a magazine freebie and the sentiment was stamped using Teenage Girl Sentiments

I would like to enter this in the following challenges:-
 Fab 'n' Funky #343 Flowers
Simon Says Stamp (Wed) Use more than one die or punch
Crafty Catz #363 Anything Goes optional twist buttons
Crafty Friends Challenge #54 B for ... (buttons, blue, birthday)
Incy Wincy Designs - Happy Birthday
Moving along with the Times #41 Handmade or diecut flowers
Southern Girls 156 Use die-cut

Thanks for stopping by,
Katrina x

Wednesday 22 March 2017

Happy Day for Leonie

Hello lovely peeps


It's a happy day today - lots of Leonie on the telly :o)
As well as 'Let Leonie Loose' at 11 and 2, she is back on Hochanda at 8pm to kick off her one day special Sale shows.

My card today was made with her latest collection - 'Typography'

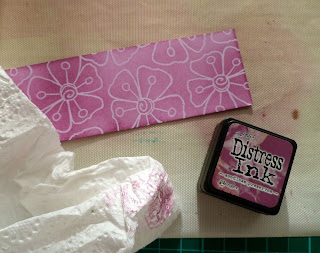
I started by heat embossing some of the Funky Tree and Fly Free stamps with Versamark ink and clear embossing powder onto Sheena's stamping card to make three different patterned strips.


Each panel was coloured with a different distress ink and wiped with kitchen towel to remove the ink from the embossed areas


Cut the strips down into squares and ink around all of the edges


To make a colour co-ordinated background for the squares to sit on I dabbed the same inks onto my craft mat, spritzed them and dragged some card through the ink


Once that was dry I inked around the edges with Pumice Stone


I arranged the squares onto the background and the added a mix of Leonie's letters, die-cut from plum coloured card.


To finish off I matted and layered onto plum and white card and added some plum ribbon.

I would like to enter this in the following challenges:-
 (to come)

Thanks for stopping by,
Katrina x

Sunday 19 March 2017

Tufty for Quirky Crafts

Hello lovely peeps


I'm appearing as a Guest Designer today over at Quirky Crafts Challenges, who I'm delighted to say are back after a 9 month break. It's challenge reminder time and the theme this month is 'Picture This'
(incorporate a photo in your project, or take inspiration from it)

The sponsors are Bugaboo stamps and Crafty Ribbons.


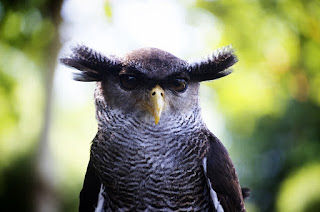
I couldn't find any nice photos of my own, but as I already have several bird stamps by Bugaboo I looked on the internet for owl pictures instead. This one made me burst out laughing, isn't he fab?


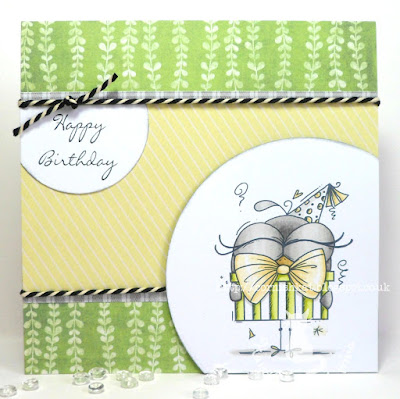
I chose Birthday Bird 03 to work with, he has great eyelashes (though they're not a patch on Tufty's). I've also drawn inspiration from the colours in the photo and tried to echo the stripy texture of his feathers with my papers and twine.

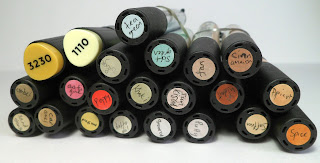
I coloured the image in with Promarkers (Cool Grey 1-5, Daffodil Bloom, Mustard, Lime Zest and Pear Green)


I layered up a 6"x6" card with papers from my stash and added a sentiment stamped with Handwritten Phrases by LOTV. 

Thank you so much to the girls at Quirky Crafts for having me as a Guest DT. They are having a DT call at the moment if you looking for a position.

I would like to enter this in the following challenges:-
Send a Smile for Kids Animal cards
Double D Challenges Things that fly
Kitty Bee Designs #90 living things with wings
Sparkles Forum Challenges # 90 Let's go green
 Simon Says Stamp (Wed) Bit of green

Thanks for stopping by,
Katrina x

Friday 17 March 2017

Sticky Notes for Leonie

Hello lovely peeps, and welcome to my new email subscriber :o)


Just popping in to show you how I made a little sticky note holder with Leonie's new Typography collection.

To make the cover I cut a piece of card down to 8cm by 17.5cm and scored it at 8cm from either end.


Tape ribbon to the inside of each end


and cover the ribbon with 8cm squares of card (no, you're not seeing things, I changed my mind and used Kraft card at this point)


Tape down the sticky note pad to the inside


To decorate the cover I coloured some Sheena stamping card with Distress Inks


then die-cut lots of letters using the Typography dies and glued them on. I used the waste from some letters also.


I trimmed around the edges and then inked over the top of the white letters.


 I finished off with a flower and leaf stamped with the Fly Free stamp set


I would like to enter this in the following challenges:-
 (to come)

Thanks for stopping by,
Katrina x

Thursday 16 March 2017

Vegetable Patch for LOTV

Hello lovely peeps


 Just a quick post from me today to show you a card I made using one of the Simply Print images from Lili of the Valley, this one is Vegetable Patch.

I've matted and layered it with papers I got at the Farnborough show in February - Potting Shed by Craftwork Cards. I roughened the edges with scissors and inked them with Gathered Twigs Distress Ink. I die-cut the stars with X-Cut and Crafters Companion dies and the welly boots were cut from one of the papers. The tags were stamped with Sentiment Tags and Family Sentiment Tags by LOTV.

I would like to enter this in the following challenges:-
 Crafting By Designs For a man
Little Red Wagon #385 Tag It
Creative Inspirations #270 use LOTV
The Male Room #56 Use wood (I've used wood paper)
The Ribbon Girls March any card (used jute ribbon & twine)
The Crazy Challenge #244 Masculine

Thanks for stopping by,
Katrina x


Tuesday 14 March 2017

Hanging Hearts for Leonie

Hello lovely peeps, I hope you are well.


I'm back to show you another card I made with Leonie's Typography collection.

I started with one of the Banners and Frames stamps, which I bent into a curve before inking up with black Archival ink.


I stamped it twice onto a square of Sheena's stamping card with some copier paper behind


then stamped again on the copier paper so I could use it as a mask. I cut along the line and kept both halves.


The bottom half was used to cover underneath the stamped line on my card. I coloured the top with worn lipstick and spiced marmalade Distress Inks


To add some texture to the coloured panel I used a flower from the Fly Free stamp set and 'inked' it with water. I first tried pressing the stamp into some kitchen towel sprayed with water, but this didn't remove much colour and was barely visible.


I got a much better impression when I spritzed the water into the air above the stamp


Once I was finished with the coloured section I used the other half of the copier paper mask to cover it up. I used the frame (straightened this time) to stamp some vertical lines down the card for the hearts to 'hang' from.


I inked up some more white card with worn lipstick DI and die-cut some hearts using Leonie's Lots of Love mixed media dies


I placed the hearts inside 5 different Typography embossing folders and ran them through my Ebosser machine.


After embossing I sanded the hearts lightly with an emery board to highlight the raised patterns

The card is finished off with some Typography letters die-cut from inked card - I cut the 'L' from the  waste


I would like to enter this in the following challenges:-
TIME OUT Challenges Love and/or Friendship with the Optional "Spotlight Stamping"
Crafty Girls Creations  #34 Always Anything Goes
Through The Craft Room Door - Always Anything Goes
Crafting With An Attitude  #25 Anything Goes Always 

Thanks for stopping by,
Katrina x

Thursday 9 March 2017

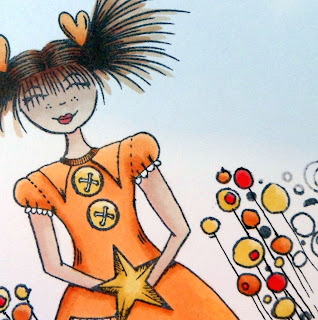
Ragdoll Photos for Leonie

Hello lovely peeps, and welcome to my two new email subscribers xx


I'm popping in with another card made with Leonie's new Typography collection, this time using the stamps and one of the embossing folders.

The 'smile' folder in the Keep Shining set gave me the idea to do some photo style toppers using the sweet little Rag Doll stamp.

So that I could build some scenes behind her, I first made a mask by stamping her onto paper and cutting her out. I put some Zig 2-way glue on the back and let it dry so it became repositionable (it goes on blue and is permanent until it dries clear)


Next I stamped Rag Doll onto some smooth white stamping card with Black Memento ink and covered her over with the hand-made mask.


I added a fence by repeat stamping with one of the Banners and Frames


then covered the fence with a scrap of paper and stamped the Funky Tree behind


After removing the masks I coloured my scene in with Promarkers and a couple of Graph'Its


For the next 'photo' I stamped the top of the Funky Tree around her and drew in straight lines with a black fineliner pen to make flower stems.


To make the photo frames I cut rectangles of card with my paper trimmer and then die-cut square apertures with one of my Nellie Snellen Multi Frame Dies


I attached the photos to the frames with double sided tape at the back and then backed them with an extra layer of card to give them strength.


To make the tag I started with a rectangle of card and ran it through my Ebosser machine with the Smile embossing folder, which I had inked up with Butterscotch Adirondack ink and a brayer.


The first one came out patchy as the ink pooled a bit on the plastic folder, so I did it again but first brayered some Versamark over the inside of the folder before brayering over the Butterscotch. This gave a much smoother coverage.

I inked up a corner of one of the frames and stamped round the edges of my tag, filling in any gaps with a black fineliner pen.


For embellishments I made up some lollipop flowers to match the central photo. I coloured circles of card with the alcohol markers and glued black wires on the back with Collall 3D Glue Gel
(I left these to dry for an hour before handling them)


I layered everything up on a 7"x7" white card blank with some First Edition papers (New Leaf and Boho Chic) and Green Sugar Sprinkles ribbon from The Ribbon Girl


I would like to enter this in the following challenges:-
 Addicted to Stamps and More #232 Make your mark
The Ribbon Girls March any card
Craft-Dee BowZ  CDB47 Anything Goes with a Handmade Bow (always)
Dream Valley Challenges # 151 Lots of layers
Deep Ocean Challenge #150 Dots and/or Stripes
Crafty Gals Corner # 113 polka dots and/or stripes
Colour Crazy Challenge #9 Anything Goes
Penny's Paper-Crafty Challenge Blog #319 Anything Goes
Classic Design Team Challenge #12 Anything Goes

Thanks for stopping by,
Katrina x