Showing posts with label embossing folder. Show all posts

Monday, 7 November 2022

Monochrome Leaf

Hello lovely peeps, I hope you are well.

I finally got back in my craft room after an absence of several months (more on that later) so that I could make a card for my Guest Designer spot today at AAA Birthday 


This month's challenge theme is 'Monochrome'


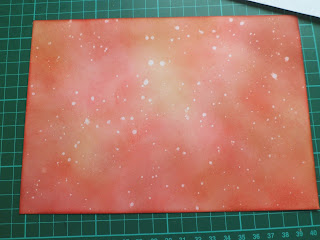
You can use shades of any one colour (and it has to be a birthday card). Given the autumnal feel to the weather at the moment I went for orange.    

Saturday, 19 June 2021

Feeling nautical

Hello lovely peeps, I hope you are well. 
 

For today's card I've used the Float My Boat stamp set by Lawn Fawn. I stamped with 2nd generation grey memento ink and then coloured in with pencils (Lyra Rembrandt)

Friday, 27 November 2020

Skating penguin

Hello lovely peeps, I hope you are well.


Today's make is inspired by this fab card by Inge Groot 


which I found on Pinterest absolutely ages ago. The expression on his face is brilliant and I love the layout.

Friday, 18 September 2020

Have a Hoot

Hello lovely peeps, I hope you are all well.


Just popping in to share a really quick card made with an embossing folder and a Woodware owl stamp, coloured with promarkers.

I would like to enter this in the following challenges:-
 Dream Valley Challenges #232 embossing
I love Promarkers #419 AG opt use an animal

Thanks for stopping by, stay safe
Katrina x

Saturday, 2 February 2019

Wednesday, 12 September 2018

Fan-tash-tic Day

Hello lovely peeps


A CAS card today using the Three Amigos stamp set from Mama Elephant.

Tuesday, 24 April 2018

Indognito

Hello lovely peeps


A bit of fun for you today :o)

Back in February when I was brainstorming ideas for the new Simply Sweet cat stamps I came across this moustache embossing folder from Darice and I thought wouldn't one of the cats look great with a moustache? (lol).  I used a Sizzix Movers and Shapers die to cut the moustache from black shrink plastic and then heated it to shrink it down. It didn't quite seem to work with the cats though so I put it to one side.

Sunday, 18 March 2018

Purrfect Couple

Hello lovely peeps


I've got another embossed card for you today, this time using the Purrfect set from Simply Sweet Stamps and a Catitudes folder from Crafters Companion.

Saturday, 17 March 2018

Tuesday, 27 February 2018

Leaf Cluster on Throwback Tuesday

Hello lovely peeps and welcome to my new email follower :o)


This week's Throwback Tuesday card has been made with stamps by Sheena Douglass - Autumn Leaves from the A Little Bit Sketchy range and the Rose Set from the Paint Fusion range.

Wednesday, 26 July 2017

Home is the Heart of Christmas

Hello lovely peeps


Just popping in to show you a wooden heart that I decorated with Leonie's Welcome Home stamps and an embossing folder.


The surface of my wooden heart was a bit rough so I covered it with watercolour paper and sanded the edges down with an emery board


Next I painted on a layer of Daler Rowney Zinc Mixing White and then mixed some of this with drops of  'arctic' glitter brush pen from Leonie's Frosty Christmas set onto my craft mat.


I brushed this on with rough horizontal strokes, with some more Zinc white added in to give the impression of a cloudy sky


Near the bottom I stamped on some of the tiny trees from the Welcome Home stamp set with Black Archival ink and then coloured them in with a white gel pen.


I stamped one of the large houses onto more watercolour card and coloured it in with Begonia and Slate Spectrum Aqua Markers (plus the arctic glitter pen for the windows)


I covered the bottom of the heart with a small piece of card that I embossed with the Dotty Days folder and then glued the house on with the steps overlapping the embossed area.


For the sentiment I inked up one of the phrases from the Christmas Greetings set but masked off the 'Home' at the beginning. Instead I used the 'h 'o' 'm' 'e' stamps from the Welcome Home set.


I chose dotty white organza ribbon to hang the heart from, to match the embossed card at the bottom.

I would like to enter this in the following challenges:- 
Let's Craft & Create Challenge #127 Just beachy/red, white blue
Pile It On #132 Primary colours
Crafting By Designs Get ready for Christmas

Thanks for stopping by,
Katrina x

Tuesday, 18 July 2017

Dinosaur Hanging on Throwback Tuesday

Hello lovely peeps


This week's unblogged make is a hanging that I made for Leonie Pujol's TV shows featuring her mixed media dies.

When I was looking at all the little triangles in Leonie's Mosaic set they brought to mind the spines on the back of a stegosaurus, so I thought I'd have a go at making a little dinosaur.  After looking at some 'how to draw' sites for children I sketched a dinosaur body onto white card and then scanned it in to my computer so I could resize it.  [If you would like a copy of this for your personal use please see my new Freebies page]

I printed it onto some watercolour card that I had coloured with Brusho crystals and then cut it out.


To decorate his body I inked up one of the stamps from the Gimme Texture set with Vintage Photo distress ink and stamped along the neck, back and tail.


For the spines I coloured some Sheena stamping card with distress inks and splatted on some water


then used several of the small triangles from the Mosaic set to die-cut the spines. These were then glued onto the back of my dinosaur cut-out.


For the background I painted some Kraft card with Titanium White acrylic and sponged on Forest Green paint at the bottom. This was then run through an 8"x8" Pebbles Embossing Folder


I sanded it back a little and smudged some Pebeo Empire Gold Gilding Wax around the edges before glueing it to a chipboard rectangle - this was a page from a Papermania Bare Basics Chipboard Album which I put new holes in so it would hang the other way.


For the wording I brayered distress inks onto some Clarity coated card, then cut it into strips


and stamped each part of the vertical sentiment from the Hey There Dreamer set, adding doodled lines around the edges of each strip.


For finishing touches I made a little red sun and a leaf for him to chew on using the Floral Bursts dies


Thanks for stopping by,
Katrina x

Thursday, 13 July 2017

Holly Wreath for Leonie

Hello lovely peeps


Our Leonie is on the telly box again today with her fabulous Christmas dies, stamps and embossing folders. The shows are at 8am, 12pm and 4pm on Hochanda.

This is the second card that I made for the shows, using the 'Softly Falling' embossing folder and some of the stamps (if you missed my first card 'Christmas Kisses' click here to see it)

First I made the background by embossing a 7"x7" piece of card


I made sure the folder edge was hanging off the edge of the sandwich before running it through the machine - to make sure I didn't get a line down the middle of the card


After the first pass I turned the card around so I could emboss the rest of it.


It matches up pretty well


This left just one un-embossed area in the bottom right corner which by happy coincidence is where I want to put part of my greeting later :o)


Next I made a topper by die-cutting a large circle from Sheena's Stamping card and stamping the small row of houses from the Welcome Home set in Black Archival Ink.


I made a sticky-note mask to cover the houses up and then stamped some trees around and behind the houses.


To colour them in I used my Gansai Tambi watercolour paints and a tiny paintbrush


These paints are so lush, but it's only the second time I've used them so I had to make a colour chart beforehand to see which colours I wanted.


I also used them to colour in some holly leaves that I'd stamped up from the Perch stamp set onto watercolour card. I ended up using three different shades of green as it looked a bit 'samey' having them all in one colour.


I added a bit of Clear Overlay sparkle pen for the snow and chimney smoke and left it to dry


then added blobs of Pinflair 3D Glue Gel around the edge of my topper


to stick all of the holly leaves to.


There's a lovely sparkle from the pen once it's dried.


I finished off with a sentiment from the Christmas Greetings set, stamped onto white card.

I would like to enter this in the following challenges:-
Deep Ocean Challenge #159 Christmas in July
Inky Chicks #85 Christmas
Creative Craft Cottages Challenges #91 Christmas in July
Sparkles Forum Challenges # 93 Embossing
Retarte  #101 Christmas in July
Get Creative Challenges #60 CAS 
My Time to Craft #349 Christmas in July
Happy Little Stampers (Christmas) option die cuts

Thanks for stopping by,
Katrina x

Wednesday, 24 May 2017

Just Be for Leonie

Hello lovely peeps and welcome to my new email follower :o)


Today I have another unseen card from the archives, using the Just Be stamp set by Leonie.

First I drew a pencil line across the bottom of some white card and stamped the words on, lining up the top of the rubber stamp with the pencil line.


Then I inked and stamped it again to line up with the first one.
I stamped the beautiful fairy in just above the words


and coloured her in with Graph'It markers. The wings were stamped separately onto vellum and attached with Collall Photoglue after colouring.


For the background layer I ran some white card through the 8x8 version of the Leaf Vein embossing folder from Crafters Companion and coloured the edges with one of my markers to match.


For embellishments I rootled in my stash and found these lovely jade coloured beads. I fed some gold wire through the centres and twisted into a little loop to hold them in place before twirling the tops of the wire around my pokey tool (to match her curly hair).  They were attached with Collall 3D glue gel to the back of the sentiment (also from the 'Just Be' set).


I finished off by stamping the single flower from the 'Just Be' set several times onto thin card, which I then coloured and cut out. These were attached with more 3D glue gel.


Thanks for stopping by,
Katrina x